This section describes the process of running programs and scripts to prepare various inputs required by DaySim, as well as the process of executing a model run.
Allocate TAZ Data to Parcels
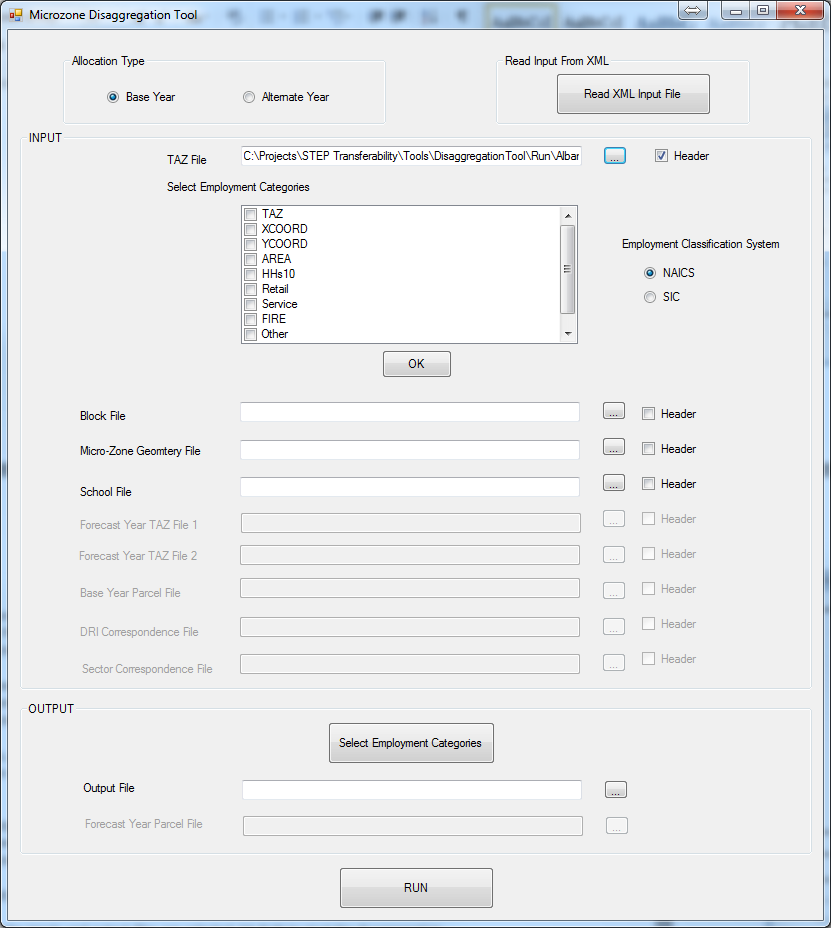
A key data preparation step involved allocating TAZ-level controls to the parcels. A flexible tool has been developed in order to allow users to systematically and easily perform this allocation.
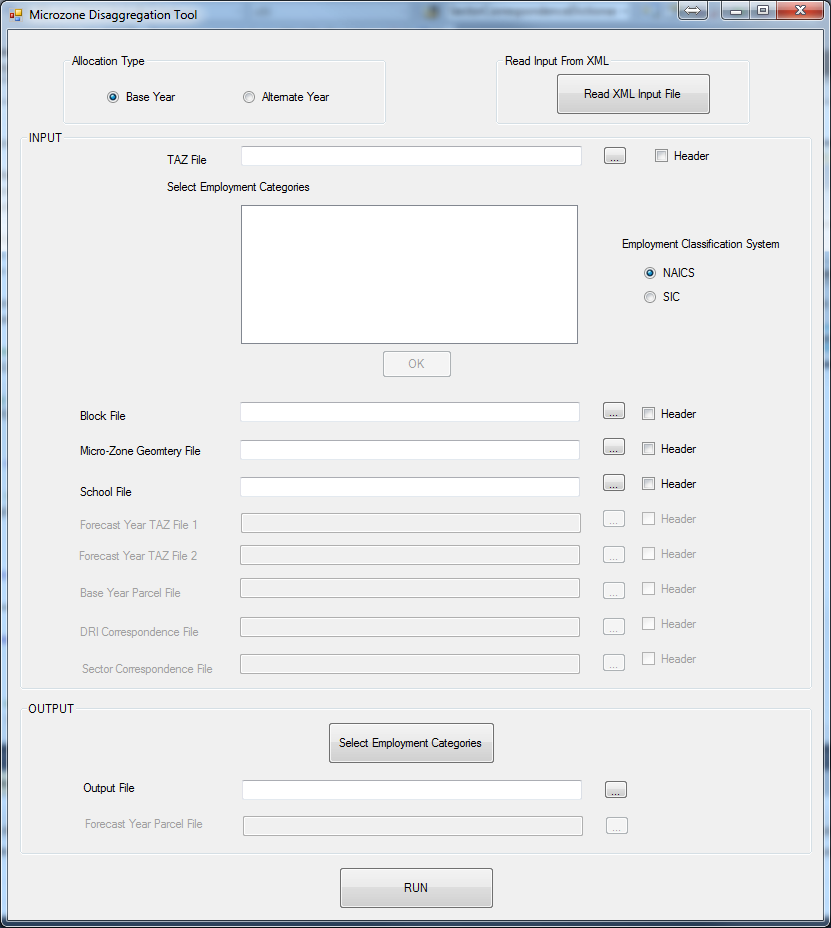
The figure below illustrates the allocation tool user interface.
FIGURE 5-1 ALLOCATION TOOL INTERFACE
If the user has a pre-generated xml input file, that can be used to populate inputs to the tool. To read an xml file, click on “Read XML Input File” button:
FIGURE 5-2 ALLOCATION TOOL INPUT

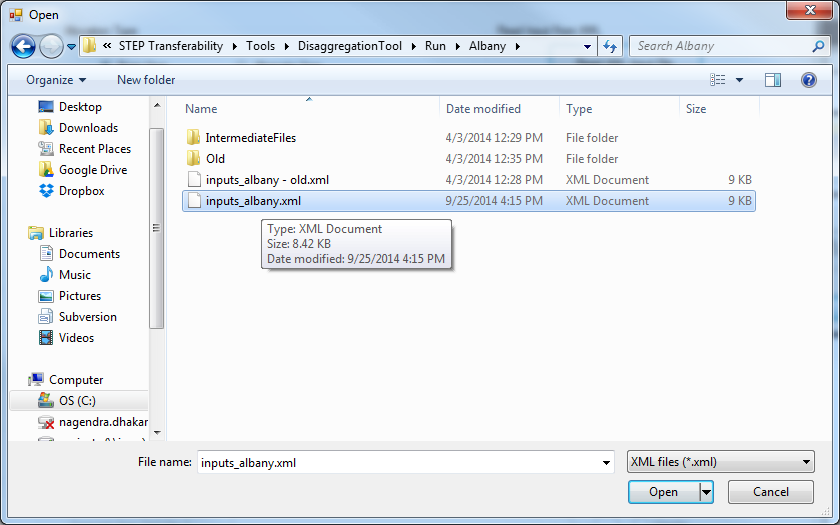
And navigate to the file:
FIGURE 5-3 ALLOCATION TOOL INPUT XML FILE DIALOG
After choosing a file, click “Open” and the input fields will be populated automatically. The inputs can be changed if required.
FIGURE 5-4 ALLOCATION TOOL INPUT SNAPSHOT
ALTERNATIVELY, the inputs can be entered manually as following:
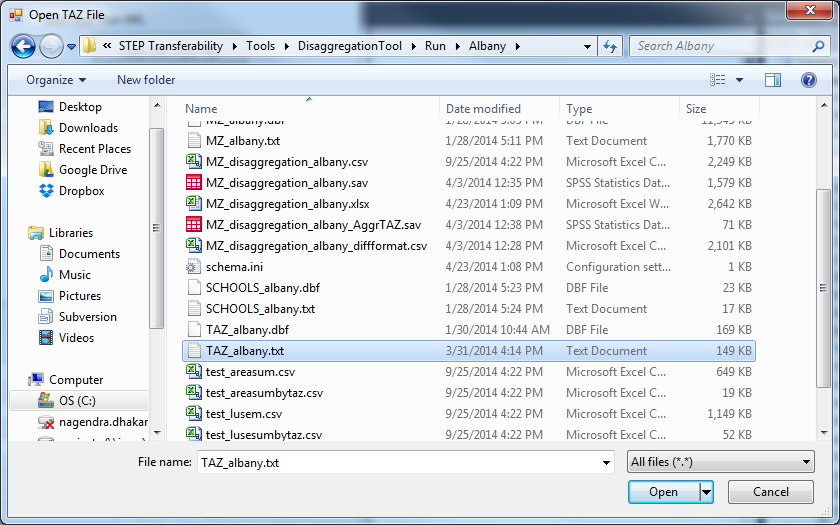
First, choose a TAZ file
FIGURE 5-5 ALLOCATION TOOL INPUT TAZ FILE DIALOG
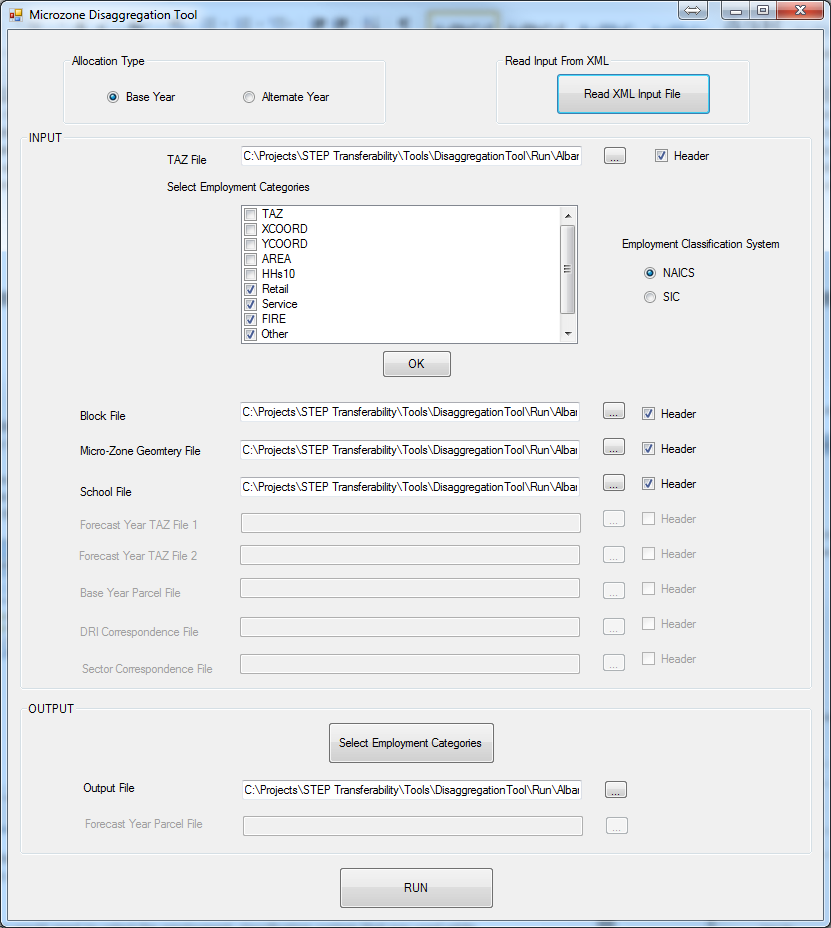
Once a TAZ file is chosen, data fields (columns) in the file would be displayed in the check box.
FIGURE 5-6 ALLOCATION TOOL TAZ SELECTION INTERFACE
The user then checks the boxes for the employment categories. In addition, the user selects the employment classification system that was used while creating the employment categories. The default is set to NAICS.
FIGURE 5-7 ALLOCATION TOOL TAZ COLUMN SELECTION INTERFACE
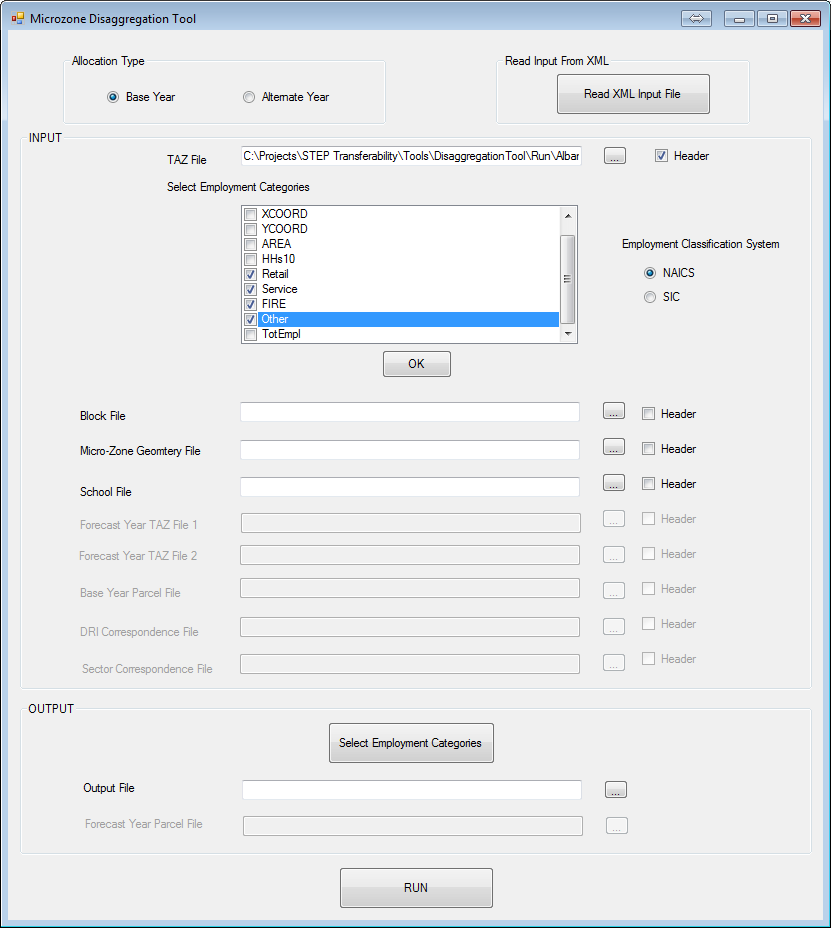
Once done, click OK button. This would open a new form asking the user to select associated NAICS/SIC codes (whichever is chosen before).
FIGURE 5-8 ALLOCATION TOOL INDUSTRY CODE MAPPING
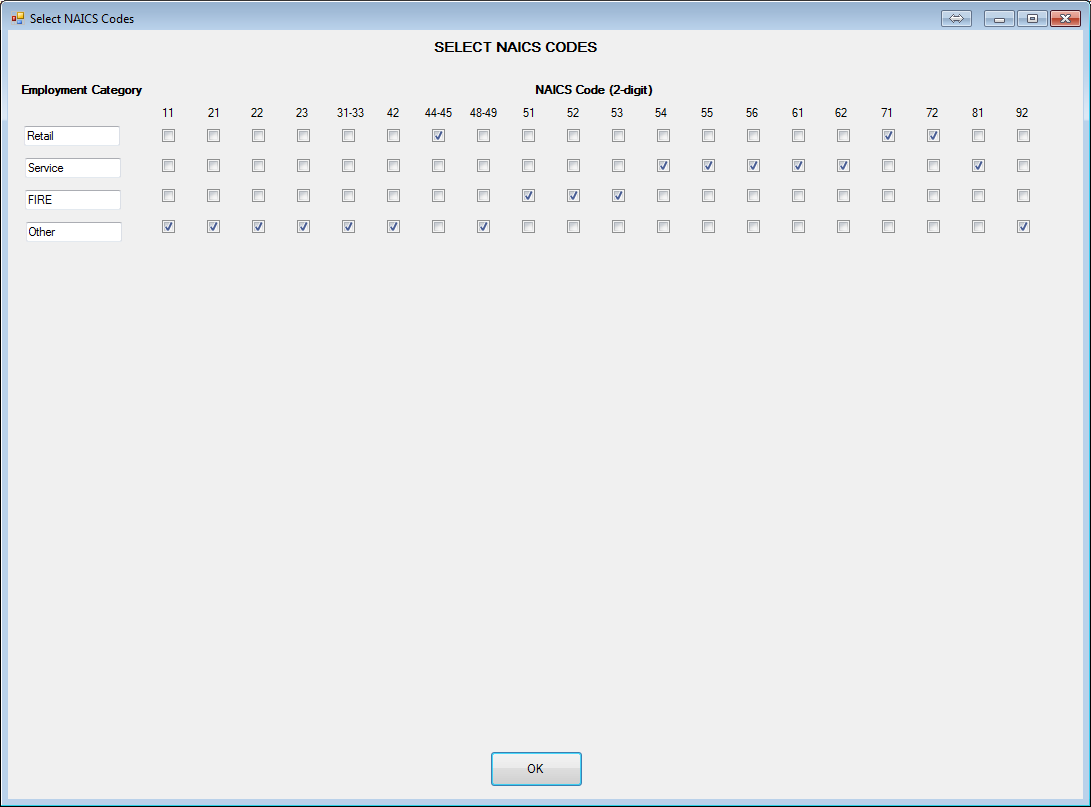
After this, choose other input files (block file, MAZ geometry file, and school file) appropriately. All four input files are space delimited text files.
FIGURE 5-9 ALLOCATION TOOL INPUT SNAPSHOT

In the output section, in addition to pointing to output file, the user can also provide output employment categories and indicate associated NAICS codes.
FIGURE 5-10 ALLOCATION TOOL DAYSIM INDUSTRY CATEGORIES
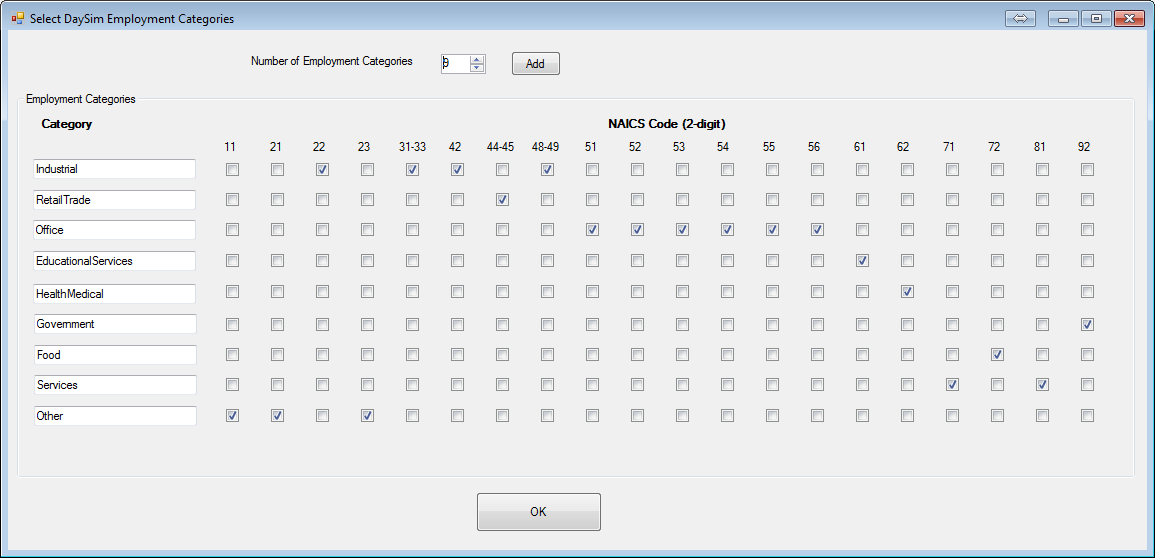
By default, it is assumed that an input file has a header. If not then uncheck the header option. Once, the input and output files are selected, hit RUN to start the distribution process.
Prepare Buffered Parcel File
As mentioned previously, the executable for bringing up the buffering tool is “DSBuffTool.exe” and can be found in the “\User.prg\DaySim_Inputs\1_Parcel\Buffering\” folder of the master model directory. Double-clicking the executable will bring up a GUI as shown in the following figure. The use of this tool is straightforward. The user just needs to specify all the inputs and click on the “Run” button at the bottom of the GUI.
FIGURE 5-11 DAYSIM BUFFERING TOOL GUI
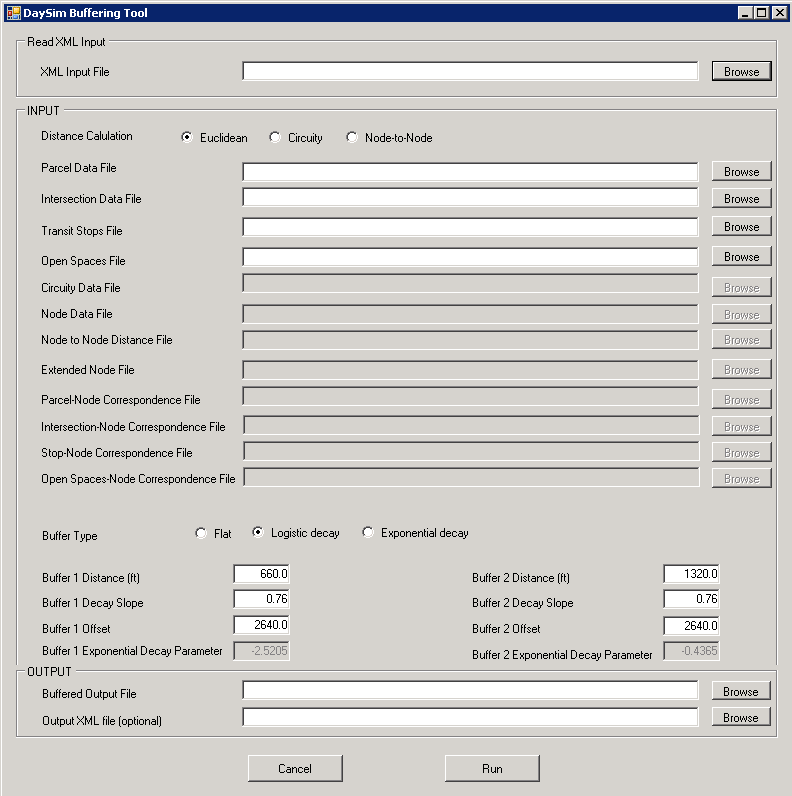
In the “INPUT” section of the GUI, distance calculation and buffer type are set to “Euclidean” and “Logistic decay” respectively. These are the recommended settings for running this tool. If node-to-node distances obtained from an all streets network are available, distance calculation may be set to “Node-to-Node”. The default recommended parameters for logistic decay weights (described in the model design chapter) such as buffer decay slope, offset etc., are also automatically populated in the appropriate fields in the GUI.
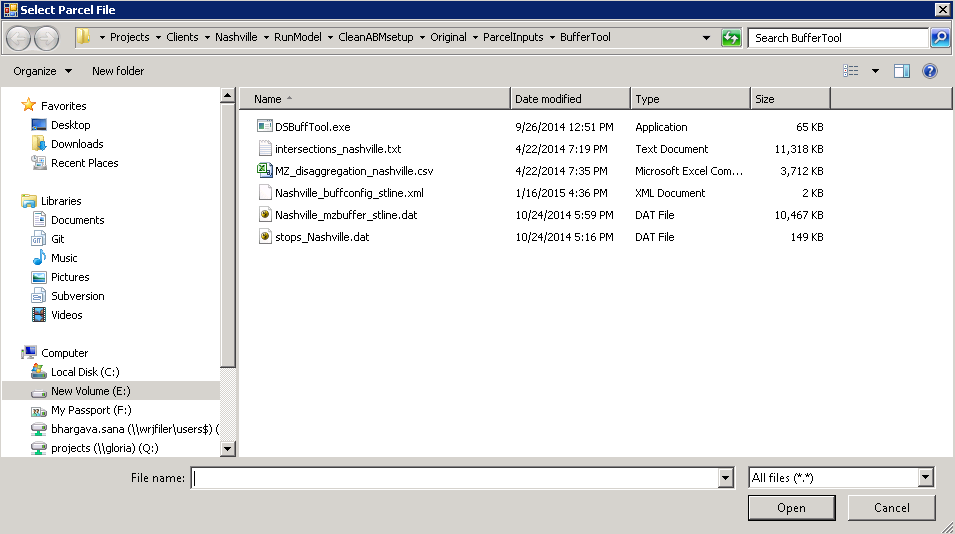
All other inputs are to specify file paths that can be done by clicking on the “Browse” button. This pops a file dialog as show in the figure below. The user may also enter full file paths manually using keyboard.
FIGURE 5-12 BUFFER TOOL FILE SELECTION DIALOG
All file specification fields for the tool are described below. Details about formats for the input files can be found in the directory and data structures chapter.
...